Find The IP Address on Windows 11 (2021)
Here, we have explained six different ways to find your IP address in Windows 11. If you want a quick explainer on what is an IP (Internet Protocol) address and the types of IP addresses (IPv4 and IPv6), you can check out the linked article. You can expand the table below and move to a relevant method based on your expertise level.
Method 1: Find Your IP Address via Windows Settings
The easiest way to find your IP address on a Windows 11 PC is through the Settings menu. To do that, follow the steps below:
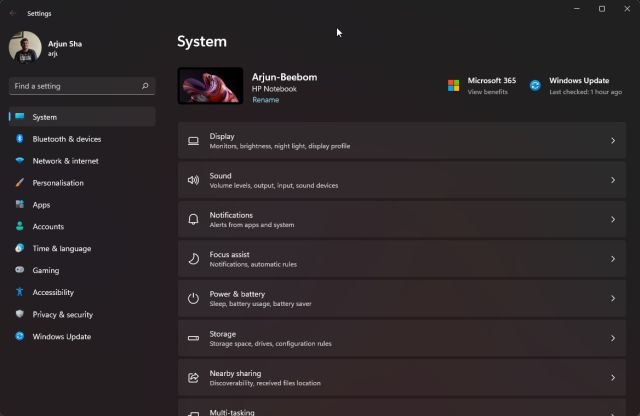
Open the Windows Settings page from the Start menu or press the “Win key + I” keyboard shortcut on Windows 11 to open it.
Once you are here, move to the “Network and Internet” section from the left sidebar. Then, click on “WiFi” on the right panel if you are connected to a wireless network. If you are using a wired Ethernet connection, click on “Ethernet”.
Then, click on the name of the WiFi network you are currently using on your PC.
Now, scroll down to find the IPv4 address. That is the local IP address of your Windows 11 PC. There is also the local IPv6 address, but you will rarely need it for local networking.
Method 2: Find Your IP Address using the Control Panel
While Windows 11 is trying to bring all the features from Control Panel to the Windows Settings page, there are still a few legacy elements left behind. And well, one of them is networking, which will come in handy for this guide.
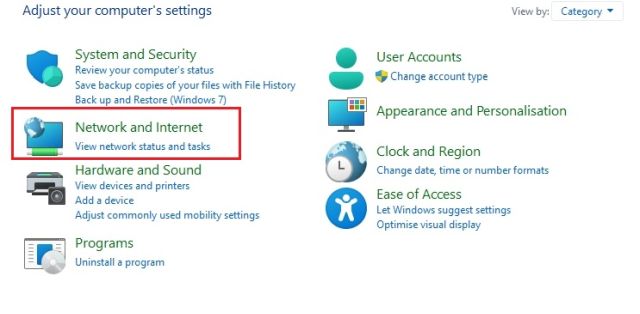
First, press the Windows key once, search for “control panel” and open it.
Next, click on “Network and Internet“.
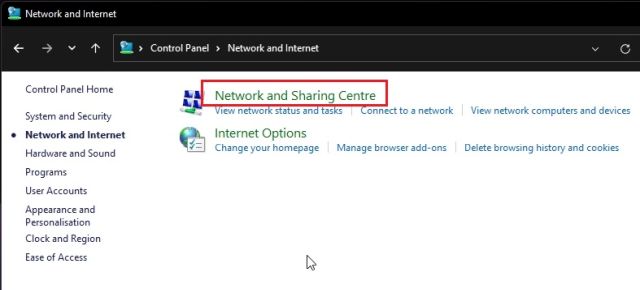
After that, open “Network and Sharing Centre“.
Here, click on the WiFi access point to which your PC is connected. If you are on a wired network, an Ethernet connection will show up.
On the pop-up window that opens, click on “Details“.
Here, look for the IPv4 address. That’s the local IP address of your Windows 11 PC.
Method 3: Find Your IP Address via Task Manager in Windows 11
Now, if you don’t want to dive into the Settings or the Control Panel, you can also use the Task Manager to find your IP address in Windows 11. Just follow these steps:
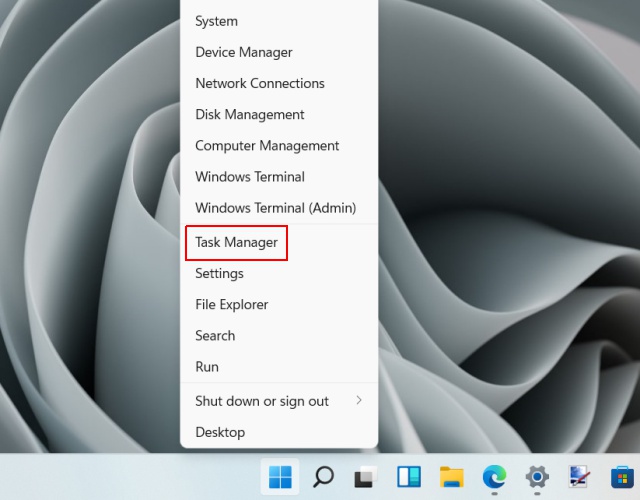
First, open the Task Manager window using the keyboard shortcut “Win + Shift + Esc” on your Windows 11 computer. Alternatively, you can right-click on the Start icon and select “Task Manager” from the context menu.
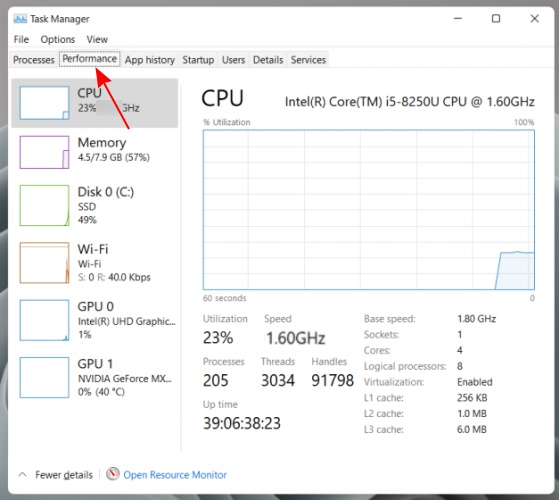
Once the Task Manager opens up, navigate to the “Performance” tab.
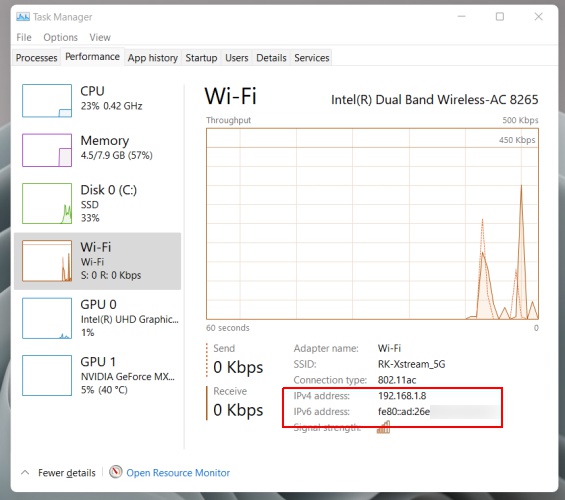
Under the “Performance” tab, you need to click on “Wi-Fi” or “Ethernet” on the left pane, depending on your internet connection. On the right panel, you will now see your IPv4 and IPv6 address at the bottom.
That’s it. You can now use this IP address for whatever you need on your Windows 11 computer.
Method 4: Check Your IP Address using Command Prompt
Another simple way to check the IP address in Windows 11 is through the Command Prompt. To do that, follow the steps below:
- Press the Windows key once and type “cmd” in the Windows Search bar. Now, open “Command Prompt”.
2. On the Command Prompt window, type ipconfig and hit enter.
- This will output a long list of information, but you need to look for “Wireless LAN adapter Wi-Fi” if you are using Wi-Fi. In the case of Ethernet, look for the “Ethernet adapter” entry. You will find the IPv4 address, which is the local IP address of your Windows 11 computer, under the relevant section.
Method 5: Check Your IP Address using Windows PowerShell
Similar to Command Prompt, power users can also rely on PowerShell to find the IP address on Windows 11. And this is what the process looks like:
Open the Start Menu by pressing the Windows key, search for “powershell“, and open it.
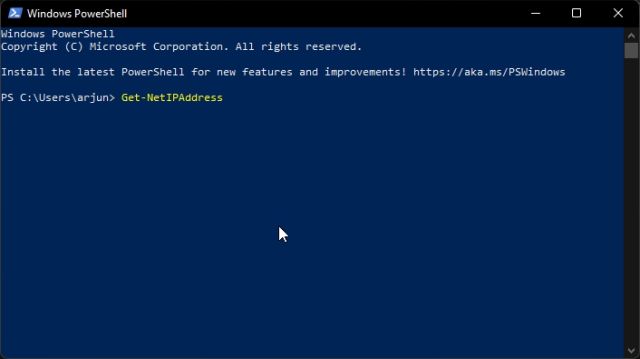
Next, type Get-NetIPAddress and hit enter.
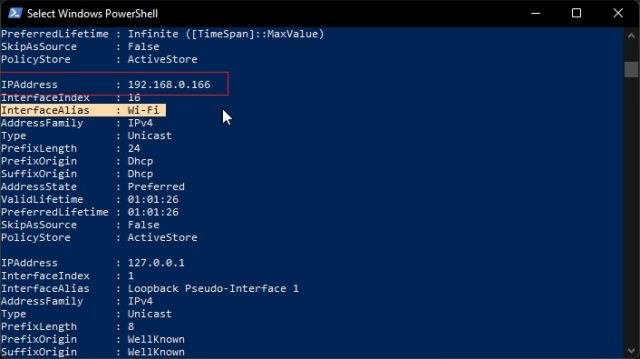
Now, look for the “InterfaceAlias: Wi-Fi” entry. Right above, you will have the IP address of your Windows 11 machine.
Method 6: Check Your Public IP Address using Google, Third-party Websites
One of the best Google Search tricks is that you can find your public IP address by typing a search query. Visit google.com and type “my ip address“, and hit Enter.
On the first result, Google will display your public IPv4 address. Some people might get a long string of characters, which is actually the IPv6 address. Whether you get an IPv4 or IPv6 address, well, it depends on your ISP (Internet Service Provider). Keep in mind this is your public IP address, so don’t share it with anyone.
Alternatively, you can go to WhatIsMyIPAddress.com (visit website), and it will show your Windows 11 PC’s public IP address along with the ISP details.
Six Easy Ways to Find Your IP Address in Windows 11
So these are six easy ways to find the local and public IP addresses of your Windows 11 computer. For most users, the Windows Settings page or Task Manager will provide all the information. However, if you want more information regarding your network, you can find them through Command Prompt or Powershell. Anyway, that is all from us. If you are looking for a way to sync the clipboard between your Android phone and Windows PC, go through our in-depth tutorial. Besides that, you can also change the Power Mode settings on Windows 11 to get the best performance. In case you have any questions, let us know in the comment section below.
