Free up Space in Google Photos (2021)
You can use Google Photos’ new storage management tool or the tool offered in Google One to manage your cloud storage. We’ve included instructions for both and you can pick the one that suits your needs. Without further delay, let’s get started with the steps involved to delete unwanted media from Google Photos. As usual, you can use the table of contents below to navigate to the section relevant to your needs.
Use Storage Management Tool on Google Photos Mobile
Whether you’re using an iPhone or an Android device, you can clean up your photo library by following these simple steps.
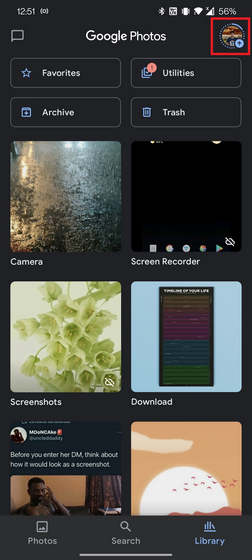
Open Google Photos app and tap on your profile picture present in the top-right corner of the app.
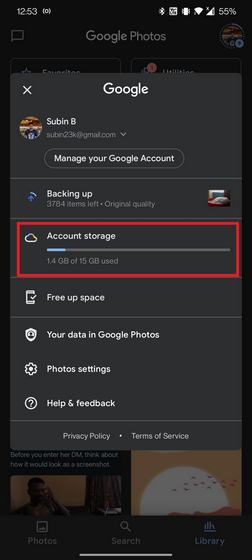
From the pop-up that appears now, tap on Account storage. You can also access Account storage from Settings -> Photos settings -> Back up & sync -> Manage storage.
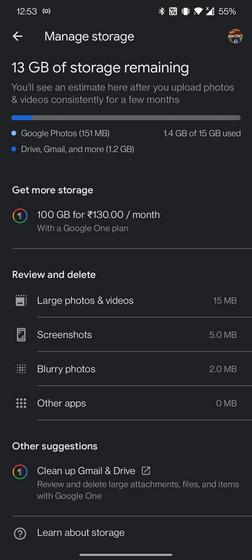
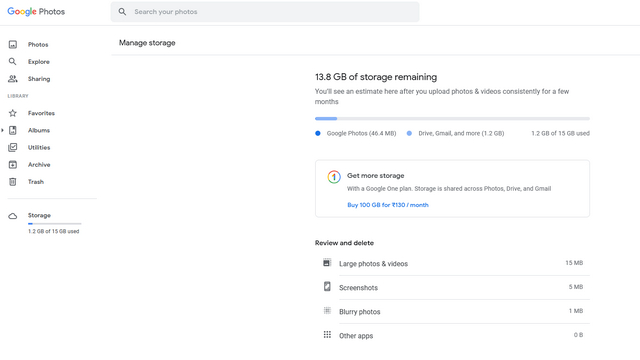
You’ll now see a few options to review and delete your photos and videos. Google Photos groups potentially unwanted media files into these categories – Large photos and videos, Blurry photos, Screenshots, and Other apps. It is worth pointing out that only photos and videos that count towards your Google Account storage will show up here.
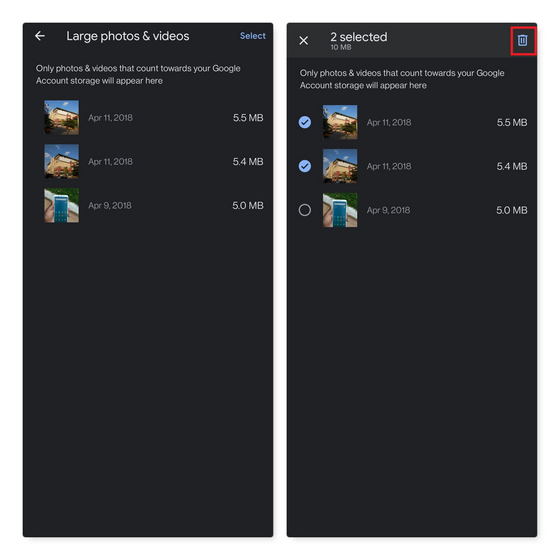
Tap on any of the aforesaid categories you’d like to review and select the ones you no longer want to keep. Once selected, press the trash icon at the upper right corner to move the files to the trash.
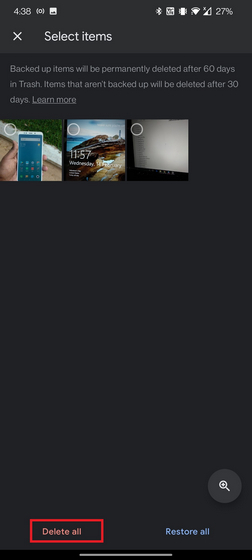
Once the files are in the trash, visit the Trash section of Google Photos and press the Delete all button to permanently delete these files and free up space on Google Photos.
Use Storage Management Tool on Google Photos Web
If you’re trying to clear out your Google Drive account storage, you don’t really need to pick up your phone to clear out your photos. You can do it from the web app as well. Here’s how.
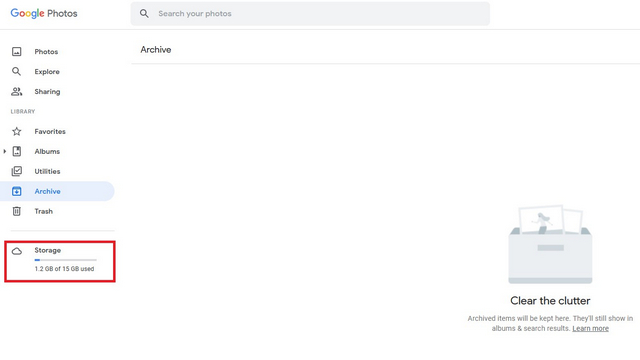
Open Google Photos on the web and switch to the Storage section from the left sidebar. You can directly access the storage quota management section from this link.
Once you’re here, you’ll see the options to review and delete photos, just like how you would on the mobile app. Click on one of those options to review media in that category.
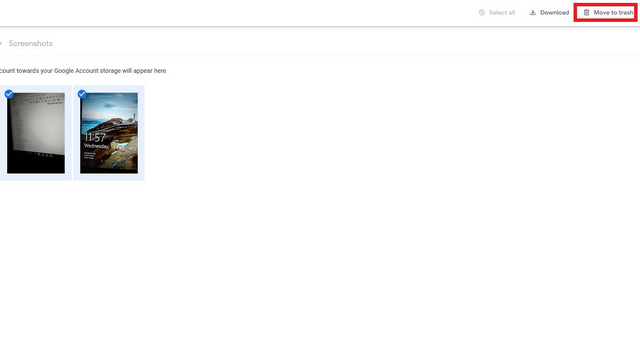
Select the images and videos you no longer need and click on the ‘Move to Trash’ button at the top right corner to delete them.
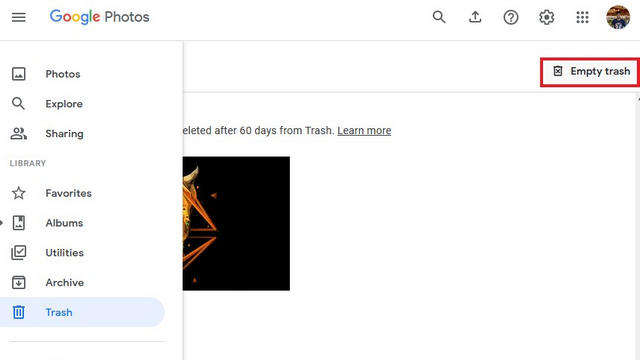
Google will permanently remove files from the trash after 60 days, but you can visit the Trash section from the left sidebar and click on the ‘Empty trash’ button to immediately delete it.
Use Google One Storage Management Tool
You can also use Google One’s storage management tool to free up space on Google Photos or across your Google account. Follow these steps to get started:
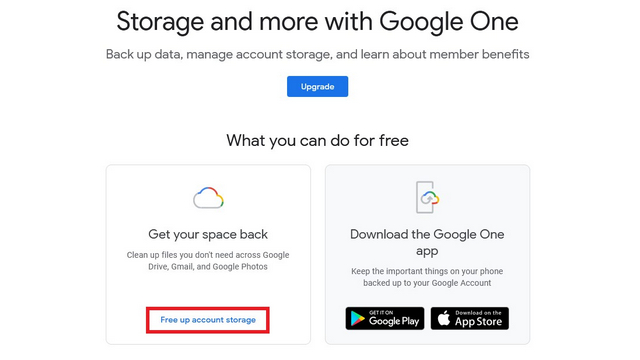
Open the Google One website and click on the ‘Free up account storage’ option. You can directly access the storage management tool from here.
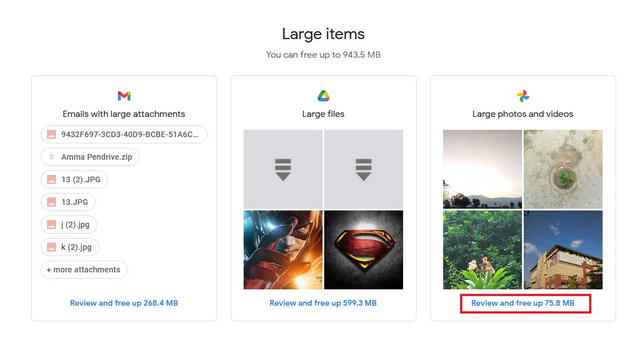
From the Google One Storage management tool, you can free up space across Gmail, Google Photos, and Google Drive. Click on the ‘Review and free up x MB’ button below ‘Large photos and videos’ to review files.
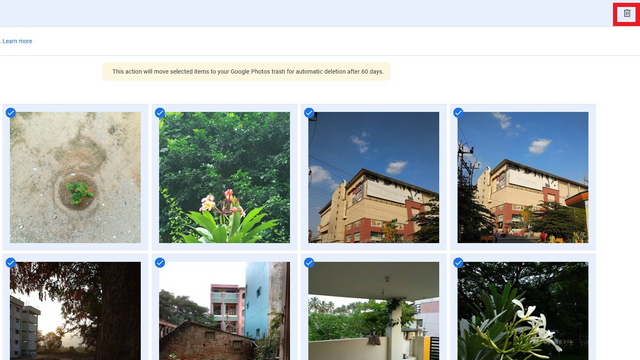
Now, review images you no longer need and click on the trash button to free up space from your Google Photos storage.
You’ll find trashed files in the trash section of Google Photos. Click on Empty Trash to permanently delete the files.
Delete Images and Videos from Google Photos
Well, that’s how you can free up space in Google Photos and make room for new files. You can use the built-in tools to easily and quickly get rid of unwanted and duplicate photos or videos that are eating into your storage. Also, I would recommend that you take a look at your Gmail storage because it might be eating into a lot of your account’s storage quota. Anyway, if you need more storage, you could consider getting Google One subscription that starts at $1.99 (Rs.130 in India) per month for 100GB of storage.
So, did you free up space in Google Photos using these methods? How much storage space did your reclaim? Let us know in the comments.
