Nintendo Switch Parental Controls
As mentioned above, the Switch offers a very comprehensive set of parental controls that you can use for all sorts of things. You can set bedtime alarms, suspend apps, and of course, set time limits and restrictions. In this article we will take a look at how you can set time limits on Switch users so you can rest assured that your kids aren’t spending all their time playing games.
How to Set Time Limit on Nintendo Switch
Setting time limits on the Nintendo Switch is quite easy, but you will need to use your smartphone to do so. The parental controls for the Switch are only accessible through a smartphone app.
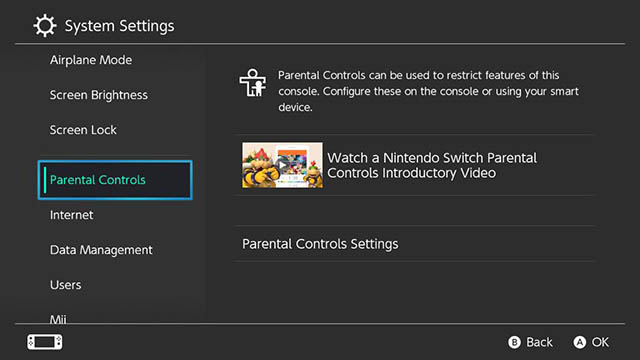
Go to Settings -> Parental Controls on your Switch.
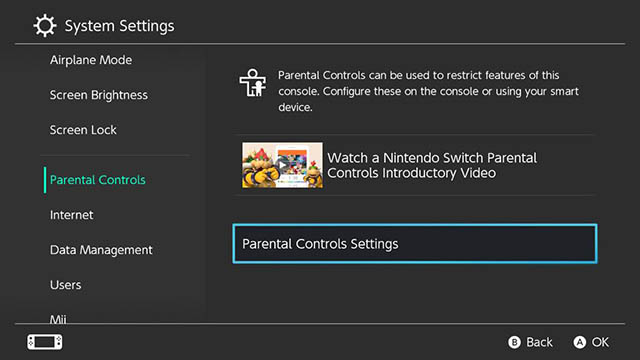
Tap on Parental Controls Settings.
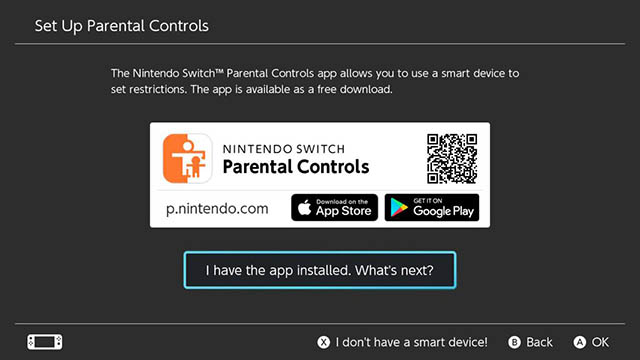
Scan the QR code with your phone to download the Nintendo Switch Parental Controls app. Or, simply download it off the Play Store/ App Store.
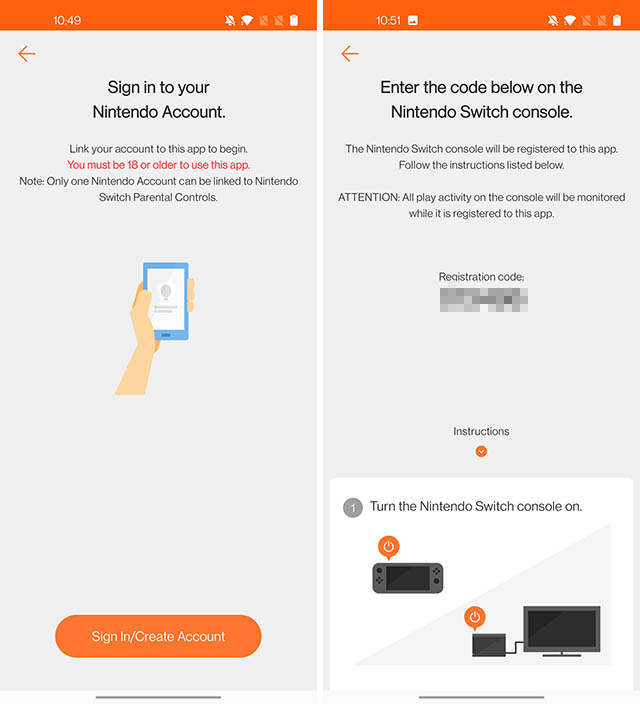
Once downloaded, tap on ‘I have the app installed. What’s next?’ button on your Switch. Launch the app on your phone and sign-in to your Nintendo account.
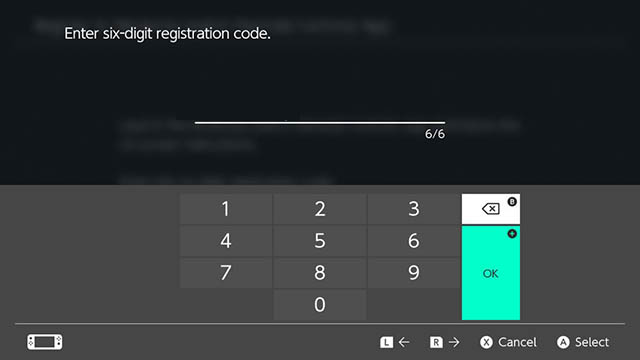
You will see a six-digit registration code on your phone. Enter this into your Switch console.
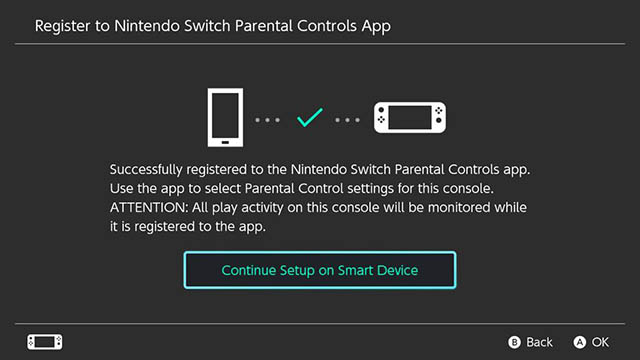
On your Nintendo Switch, tap on ‘Register’ and then tap on ‘Continue Setup on Smart Device’.
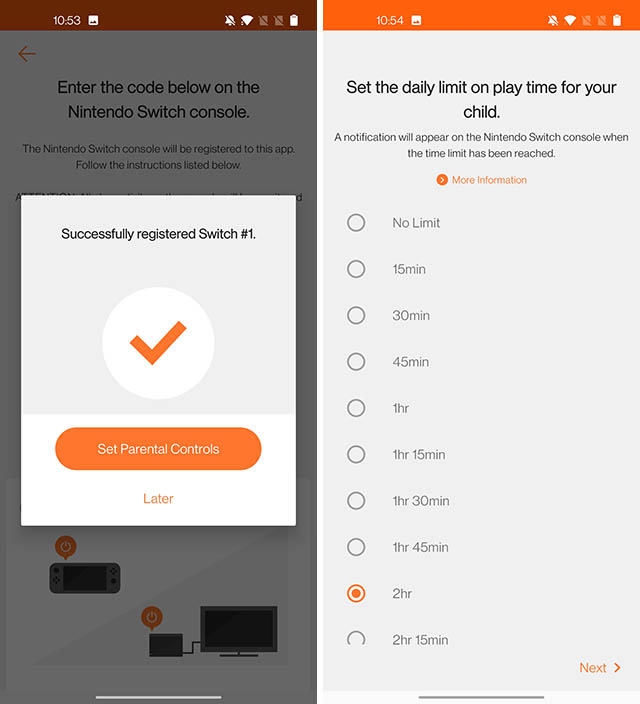
On your phone, tap on ‘Set Parental Controls’. You can now set a time limit on Nintendo Switch use. This ranges from 15 minutes to 6 hours in a day, in 15-minute increments, so you get plenty of control. Choose the time limit you want to set and tap on ‘Next’.
At this point, you have successfully set time limits on Nintendo Switch. The Parental Controls app also lets you add more restrictions. You can set up a restriction level for your child in order to ensure they are not exposed to mature content, and even disallow them from communicating with others in-game. Once done, tap on ‘Complete’.
Set Time Limits Per-Day
If you don’t want to set a strict time limit that just blindly applies to every day of the week, you can actually set up time limits on a per-day basis as well. This way, you can ensure that your kids don’t play too much during school days, while also allowing them to get their game on at the weekend. Here’s how to do that.
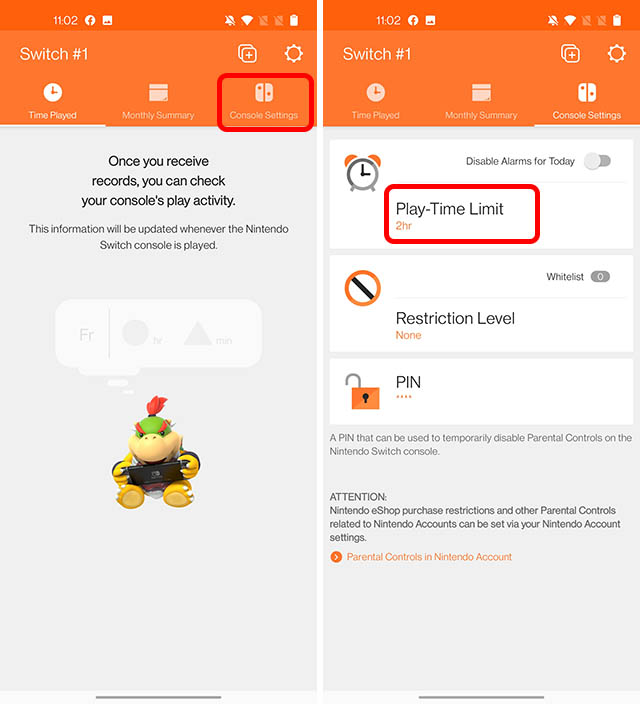
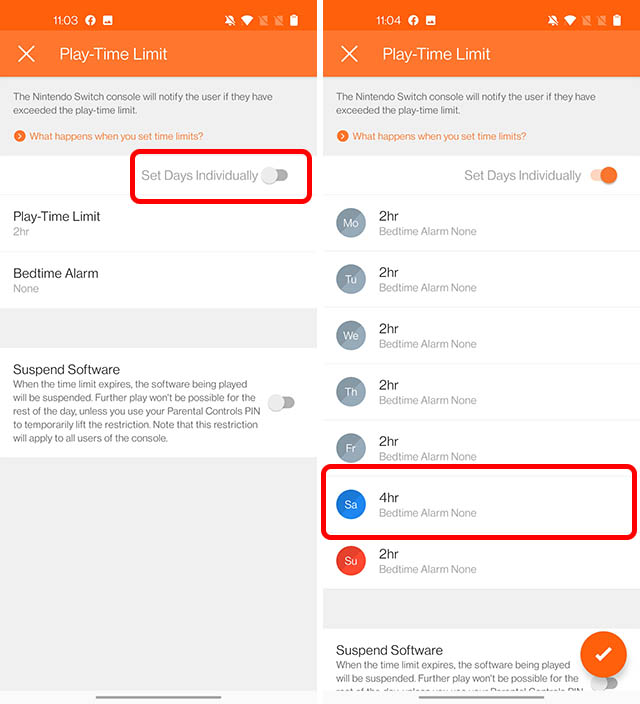
In the Switch Parental Controls App tap on ‘Console Settings’ and then tap on ‘Play-Time Limit’.
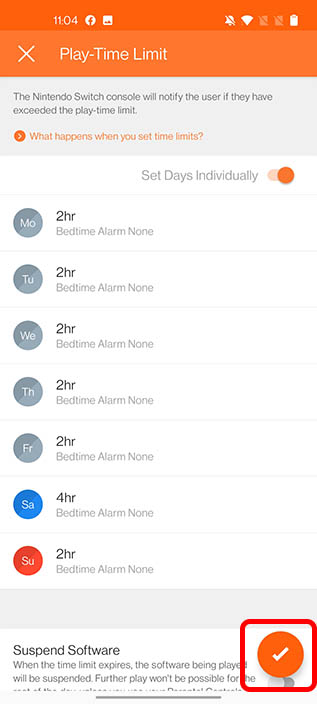
Enable the toggle next to ‘Set Days Individually’. You can now select any day and set up a time limit for that particular day. For example, I’m setting 4 hours for Saturdays so I can spend the weekend playing a lot more games than I normally would.
Once done, just tap on the ‘tick mark’ icon on the bottom right of the screen.
Suspend Apps on Nintendo Switch
Setting time limits is good, but what good is it if you reach the time limit and you simply get a notification for it. That’s not enough to stop kids (or myself, for that matter) from ignoring the alarm and just continue gaming. Fortunately, you can set apps to suspend once the time limit is reached. Here’s how.
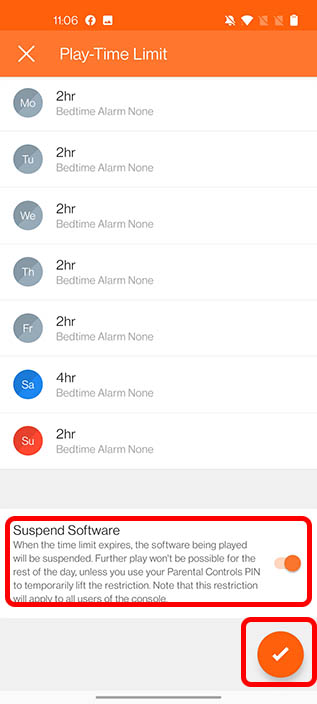
In the Switch Parental Controls App tap on ‘Console Settings’ and then tap on ‘Play-Time Limit’.
Scroll down and enable the toggle next to ‘Suspend Software’. Then tap the ‘tick mark’ button on the bottom-right of the screen to save your changes.
Use Parental Controls to Set Time Limits on Nintendo Switch
That’s it, you’ve successfully set up parental controls to limit game time on your Nintendo Switch. You will get notified when the time limit is over and you can even set apps to suspend once the time limit expires. That way you can ensure that your kids can’t just continue playing after the set time limit is over. It’s a pretty feature-rich app with considerably granular controls. So, if you have kids at home, or if you’re trying to cut down on your gaming time, you should set time limits on Nintendo Switch with the parental controls feature right away. Let me know in the comments whether you’re using this feature for your kids or for yourself. Don’t be shy, I’m using it for myself as well. That said, if you ever get too annoyed with the console, you can always reset it and sell it off; just saying.
