What is Trello and how does it work?
Trello is a visual-editor based project management tool that brings fun back to task planning.With over 5 million registered users, it is a flexible tool for both your office and home requirements. Let’s dive in and take a look for yourself how to use Trello.
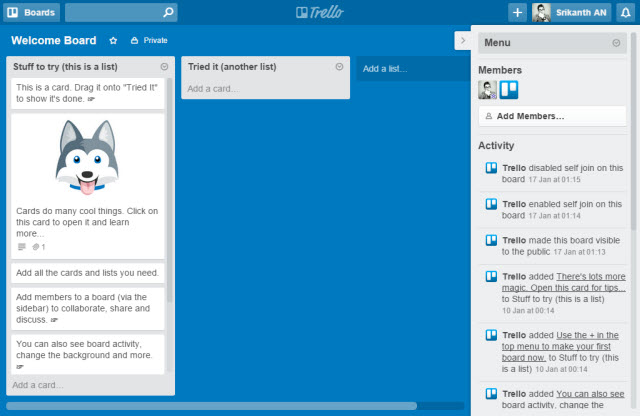
Trello makes use of boards, lists and cards as the basic structure to help you complete your tasks. It makes use of a top-down approach to achieve tasks in your project. Task management with Trello starts by creation of a board, which is the primary top-level motive of a workflow task. It allows addition of as many number of members you wish to add to it and collaborate seamlessly with them, so you can embrace Inbox (0) with it. The tool perfectly suits every project that you could think of – Be it a boardroom meeting or a weekend hangout plan with friends; it has got you covered. Individual tasks, or cards, which make up for content on a Board could be created, labelled, shared and even be set up for reminders. Now let’s get into the network and see how to accomplish your tasks and get work done with this tool.
Getting started with Trello: The Basics
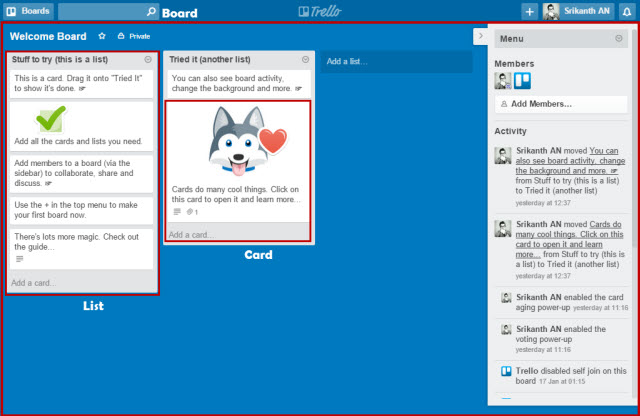
A new Trello project could be easily broken down into three major key components – Boards, Lists and Cards.
Boards: A Board is the top-level primary task of your project. Be it planning a trip with family or for your business’ re-design plan, a Board is what a project is all about. A board gives you a birds’-eye view of your entire project, from where you can plan your immediate next tasks.
Lists: Lists help you organize tasks that are similar in nature or tasks that together make up a next-level hierarchy in your top-bottom approach to project management. Say, for example, for wedding planning, you could include lists like ‘Tasks to do’, ‘Done tasks’, ‘Invited people’, ‘People to invite’, and so on.
Cards: Cards are the basic task elements that put together make up the big-picture of your project at hand. Cards are arranged sequentially in a vertical manner, which make up a List. These cards could be dragged and dropped to anywhere across the board. A card is the most significant aspect, which could be colour labelled, added check-lists, deadlines, timestamps, stickers, etc.
This is all the basics you would be needing to know before getting started on your first project with this tool. Let’s see it in action as we build a project workflow using Trello.
Organizing your Projects with Trello
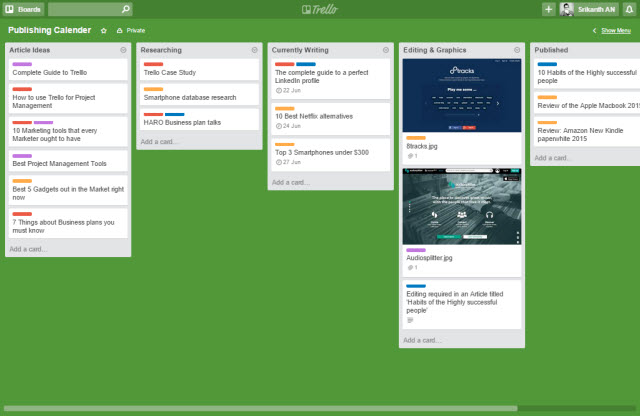
As we have established before, creating and managing projects with this tool is a pretty painless process. To walk you through all of the best features and its capabilities, we’ll work with an example, here it is a ‘Publishing Calendar’ using Trello. Creating a new Board
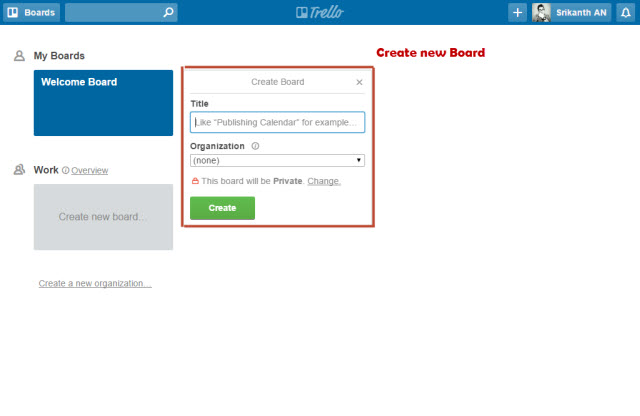
As mentioned before, Boards are the top-down approach to projects that ought to be managed, in this case, we’ll call it a ‘Publishing Calendar’. On your home screen, you can hit ‘Create new board’ and give it an apt title, before hitting ‘Create’. Adding New Lists
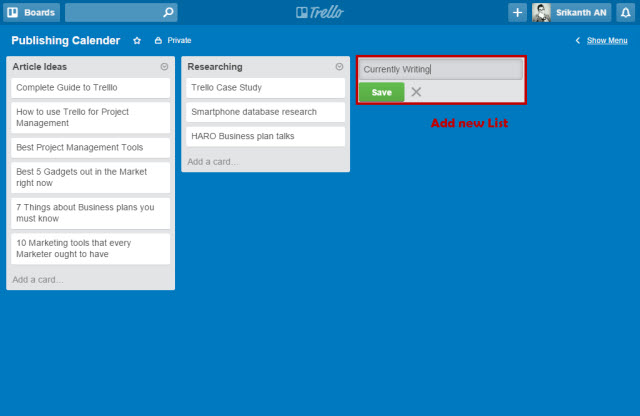
Above you can see Two lists already made – ‘Article Ideas’ and ‘Researching’, while setting up a new list is being shown. Lists are the collection of tasks based on their nature. The tool follows a left-to-right and top-to-bottom approach while traversing through tasks in its Board. Hit ‘Add new List’ to create new relevant lists as seen above. Adding New Cards
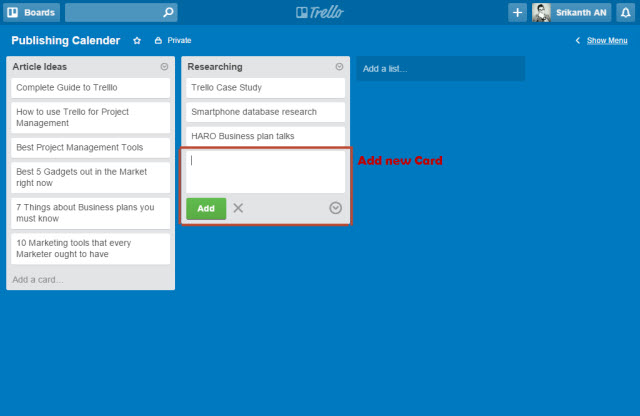
Cards are the individual tasks that are to be performed. Creating and managing tasks gets pretty easy. As shown above, hit ‘Add a card’ seen at the bottom of a list to add a new task. By entering to the next line, a new card is automatically created for you. Card description could also be added to make it more useful and detailed for the members involved in it. So, now that we have the bare-bones of our project workflow set up, we’ll look at the tweaking options to get better organized. Card Power-ups
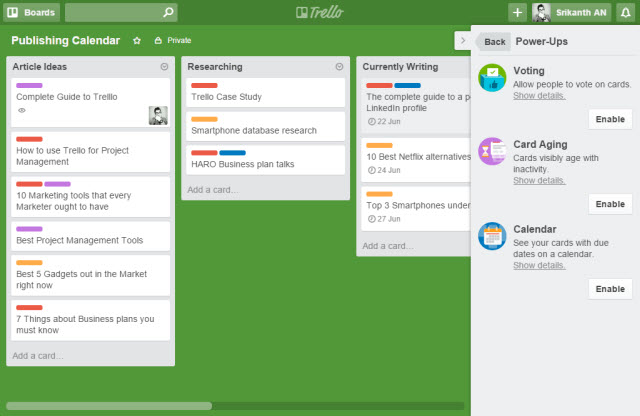
Power-ups are additional features available for your cards/tasks. From the Menu on the right sidebar, you can access Card Power-ups. Among these are Card voting system, Card ageing and Card Calendar.
A ‘Card voting system‘ when enabled, allows invited members to vote on a specific card.
‘Card ageing‘ feature allows a specific age in weeks to be defined to a task, after which it will start ageing, or becomes more progressively transparent through the days and finally cracks up.
‘Card calendar‘ allows all the tasks with a Due date to be viewed in a Calendar available through the Board’s main page.
Other additional Features
While the above mentioned features are the primary ones encountered, the experience is further improved with these additional features.
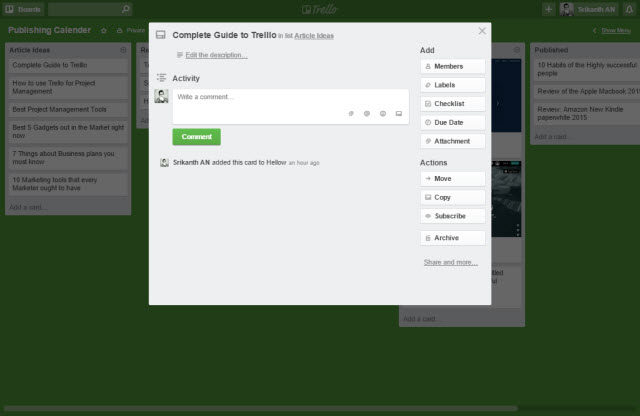
‘Add Members‘ to individual cards and use ‘@’ to mention them in the Comments section of a card. The members would be notified and further actions could be taken through the same comments section. So, no more flooding of your inbox now.
‘Add Due Date‘ to your cards to let you know easily about an upcoming important task at hand. When ‘Card calendar’ is enabled, these tasks with Due dates could be viewed on the Board’s main Calendar.
‘Add Attachments‘ allows users to attach media and all types of files and documents to a card, which could be accessible to other members added to the card. These attachments could be either from your local hard drive or from your cloud accounts across Google Drive, Dropbox, One drive, etc.
‘Edit Labels‘ allows you to organize tasks as per their categories and label it accordingly using colored stripes. Labeling this way allows you to Filter cards easily.
‘Subscribe‘ allows you to be updated with all the happenings in a board or in a particular card in a specific list.
Stickers are also available, which could be easily dragged onto cards.
Change Background colour of your Board from the same menu bar to give it a fresh new look.
Desktop Notifications To keep your Inbox (0) intact while managing projects, it features a Desktop notification facility. You can choose to turn on desktop notifications for getting alerted every time someone in the project team mentions you using ‘@’.
To turn ‘On’ notifications, click your user profile icon located at the top right corner of your Trello page. From the menu, select ‘Settings’. Under the ‘Notifications’ section, select ‘Enable desktop notification’. You will asked by your browser if you want to Allow or block such notifications. Choose the appropriate to have desktop notifications enabled.
To turn ‘Off’ these notifications, head over to the Settings section of your web browser. Go to ‘Content settings’, found under Privacy in Advanced settings in Google Chrome. Head over to Notifications sub-heading, hit ‘Manage exceptions’ and remove a link that mentions Trello. Now you would have turned off your desktop notifications for this tool.
Keyboard Shortcuts
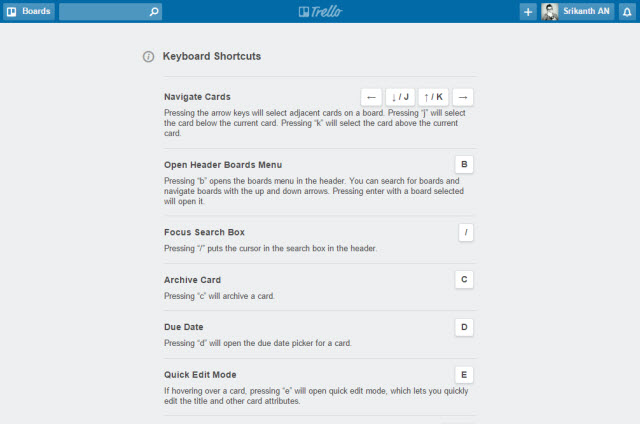
Trello does offer a few keyboard shortcuts that make the entire process even smoother. Below are a few of the most important keyboard shortcuts that it offers:
Auto-complete Members: @ Clear all Filters: X Add Voting feature to a card: V (Voting Power-up must be enabled beforehand) Edit Title: T Assign/Un-assign yourself to a card: SPACE Subscribe: S Insert new card: N Add/Remove members: M Add Due date: D Navigate: Left (->), Right (<-), Up (K), Down (J)
For a complete list of Keyboard shortcuts, head over to their official webpage. Languages Supported Trello is available in four major languages – English, Deutsch, Español and Portuguese. Platforms Supported Trello is available as a Web application, Android, iOS, Windows 8 and Kindle Fire applications. Finishing it Up
So, above what you see is a sample ‘Publishing Calendar’ made using this tool. It features all the important stages of an Editorial Calendar in a manner that is comfortable to look at and take the necessary actions. While this was one way of putting Trello to use, you can make your own boards and tasks as per your required course of action. You can print this workflow or export it as a Link or JSON. The planning of a workflow could even be set up as a Daily lists, targeting at the activities at a single day-level. So by now you must have gotten the gist of this tool and how powerful as a project management tool it is.
Trello for Advanced Users
For organizations using Trello with different teams, say editorial and marketing, this is a great tool. It lets all of your scheduling stay under separate boards, yet under a single umbrella, by creating a new ‘Organization’. At the home screen, you can create two new organizations in this case as ‘Marketing’ and ‘Editorial’. While creating a new Board, you can choose the relevant ‘Organization’ from the drop down list below it. Trello For Business and Premium Plans It is free for everyone and features unlimited boards and organization creations. But for more advanced individual users and businesses, It also offers premium plans – Trello Gold ($5/month), Business class ($3.75/month per user) and Enterprise (Pay as you go). Why consider Trello Premium Plans?
Trello Gold offers card attachments of 250 MB in size, while the regular plans allow only file uploads of 10 MB.
Add your own backgrounds, stickers and emojis with Trello Gold.
Trello Business class allows businesses to create public and private boards, which are all accessible under the organization. It provides a better administrative control with user roles.
Business class features support for Google Apps Integration.
The tool also features its own Android and iOS mobile applications for workflow management on the go. Real-time notifications, collaboration and attaching of media and docs through even its mobile application makes a great case for it.
Trello Boards Put to best use
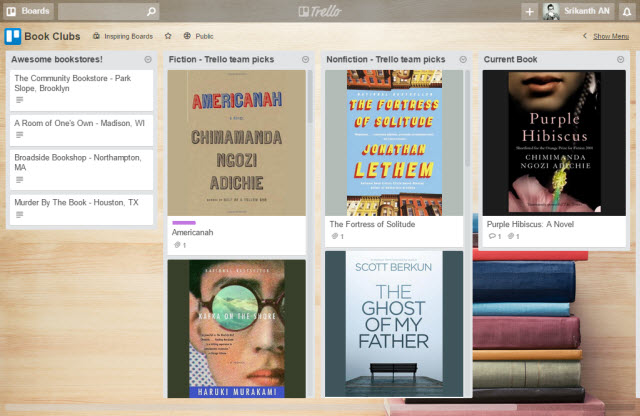
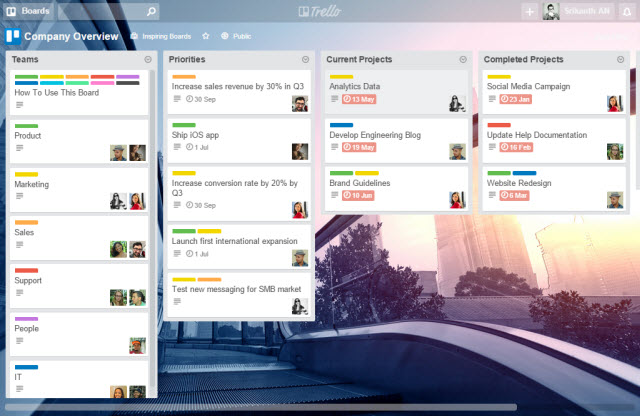
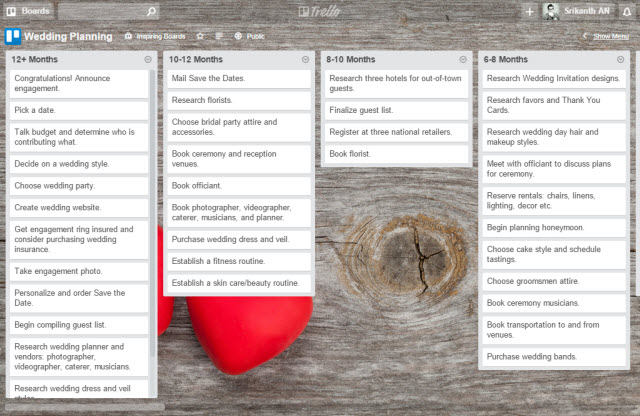
Trello seamlessly integrates with Zapier, to connect it to other third-party apps and automate repetitive tasks. You can manage almost any and every project and plan using the tool’s flexible system. Below are some of the Trello Boards that you can draw out inspiration from. SEE ALSO: How To Use Dubsmash, A Beginner’s Guide
Conclusion
Trello is definitely one of the most powerful project management app that the internet features right now. This tool is made alike for both individuals and business to make the most of its flexibility. You can create and manage almost any kind of tasks using this tool. So, here we come to the end of this guide depicting how Trello works and how to fine tune it to your project accordingly. What are your thoughts and experiences regarding this tool? Feel free to share your thoughts and comments below.
